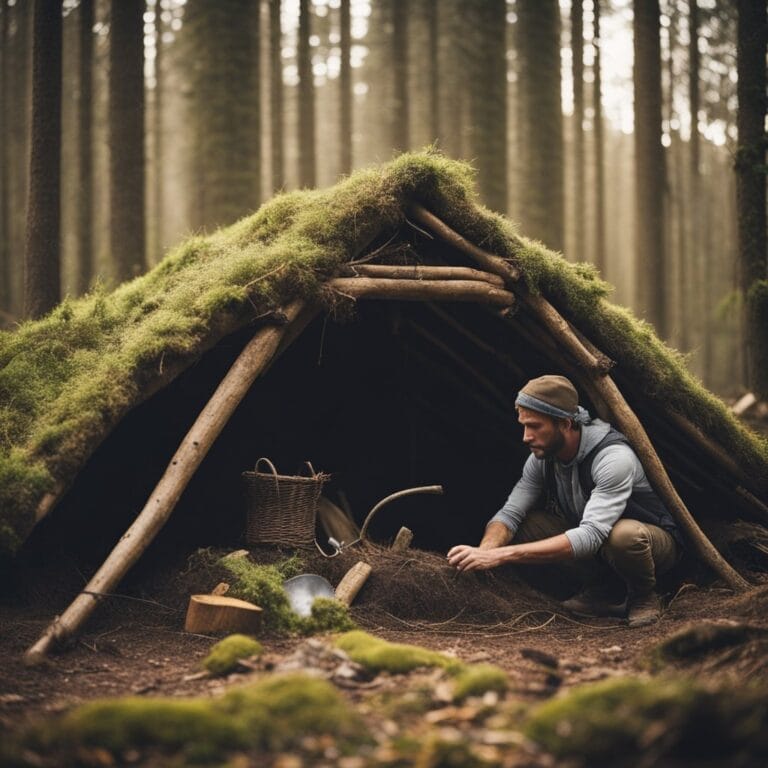
When venturing into the wilderness, the ability to create a primitive bushcraft survival shelter could be a life-saving skill.
Whether you’re planning an extended stay in the backcountry or preparing for unexpected outdoor emergencies, understanding how to construct a shelter using the resources nature provides can provide you with essential protection from the elements.
Primitive shelters are crafted from natural materials like branches, leaves, and earth, and are designed to keep you warm, dry, and safe.

Constructing your own survival shelter requires more than just piling up branches; it involves selecting a suitable location, understanding basic design principles, and safely gathering and preparing materials.
Developing these bushcraft skills is not only about survival, but also about connecting with the natural environment in a respectful and sustainable way.
By mastering these practices, you can enhance your outdoor experience and increase your confidence in your ability to adapt to and thrive in nature.
Key Takeaways
- Learning to build a bushcraft shelter is essential for comfort and survival in the wilderness.
- The right location and design principles are crucial for a stable and effective shelter.
- Regular practice is key to refining your shelter-building skills and bushcraft knowledge.
Table of Contents

Understanding Survival Shelter Basics
In the quest for survival, your shelter is not just a place to rest; it’s a crucial barrier between you and the harsh elements.
Importance of Shelter in Survival
Your survival shelter serves as your frontline defense against extreme weather conditions. Whether it’s the scorching sun, chilling winds, or relentless rain, a well-built shelter can offer protection from the elements and help prevent hypothermia or heatstroke.
Components of a Survival Shelter
A reliable survival shelter consists of three key components: framework, insulation, and waterproofing.
- Framework: Sturdy branches, logs
- Insulation: Leaves, pine needles, grasses
- Waterproofing: Moss, bark, tarps
Preferred Tools for Building a Survival Shelter
While you can construct a shelter with just your hands, having the right tools can expedite the process and enhance the shelter’s integrity.
- Fixed-blade knife: For cutting and carving wood.
- Hatchet: For chopping branches and logs.
Choosing the Right Shelter Location
When building a bushcraft survival shelter, your safety and comfort depend significantly on its location.

Considering Climate and Environment
The climate and environment of the area dictate your shelter’s design and positioning.
In cold environments, you want to minimize exposure to chilling winds and maximize sunlight exposure by orienting your shelter towards the sun.
Conversely, in hot climates, look for natural shade and areas where the breeze can help cool you down.
Always be mindful of the environment’s risks, such as flood zones or frequent landslide areas.
Evaluating Terrain and Resources
Selecting a flat or gently sloping piece of land makes the construction process easier and ensures the stability of your shelter.
Ensure the terrain is free of hazards like dead trees that could fall.
Additionally, your chosen location should have easy access to building materials like wood, leaves, and rocks.
Resources should be abundant to minimize the effort in transporting them to your shelter site.

Proximity to Water Source
Being close to a clean water source is vital for hydration and hygiene, but not so close that there’s a risk of flooding or contamination from your shelter.
Ideal positioning is about 100 feet away from a water source, which balances ease of access with safety. Remember to validate the water quality to ensure its safety for consumption.
Design Principles of Survival Shelters
When constructing a survival shelter, your primary concerns are insulation and warmth, effective water protection, and ensuring proper ventilation and airflow. Let’s explore how you can incorporate these essential principles into your shelter.

Maximizing Insulation and Warmth
To maximize insulation and warmth in your survival shelter, choose materials that trap air and retain heat.
Gather dry leaves, pine needles, or grass to line the interior of your shelter, taking inspiration from the natural insulation properties found in birds’ nests or mammal burrows.
- Materials: Leaves, Pine Needles, Grass
- Purpose: Retain Heat, Trap Air
A solid foundation prevents ground moisture from seeping in and allows for additional insulation materials, such as soil or snow, to be piled on the exterior for extra warmth.

Ensuring Water Protection and Drainage
Effective water protection begins with selecting a site that is naturally elevated or modifying the terrain to encourage rain and water to flow away from your shelter.
Construct a slanted roof or overhang to redirect rainfall, and remember that proper drainage is key to staying dry.
- Site Selection: Elevated Ground
- Construction: Slanted Roof, Overhangs
Incorporating an angled design, similar to a debris hut or lean-to, enhances water runoff. When adding insulation, ensure it extends past the edges of your shelter to guide rain away.

Ventilation and Airflow
Even in cold conditions, proper ventilation is essential for managing condensation and reducing the risk of hypothermia due to damp air.
Design an entrance that allows for airflow but doesn’t let in wind or precipitation.
- Entrance: Shielded, Positional for Airflow
By creating a small vent at the top of the shelter, you promote continuous air exchange and prevent smoke from building up if you’re using a small heat source inside. Always balance your need for warmth with the necessity of fresh air.
Gathering and Preparing Shelter Materials
When constructing a bushcraft survival shelter, choosing the right materials and having the knowledge to process them are the key to creating a sturdy and protective structure.

Sourcing Natural Materials
Begin your shelter construction by finding the necessary natural materials in the surrounding environment.
Look for long branches or saplings for building a frame and leaves, twigs, and forest floor plants for insulation and covering.
For optimal sustainability and minimal impact on the environment, select resources that are abundant and renewable. This might include fallen branches instead of cutting live trees.
Processing Materials with Primitive Tools
With primitive tools such as sharpened stones or rocks, you can shape and split wood.
Learn how to craft basic cordages from plant fibers for binding your structure together.
You can also create a sharp edge by flaking stones to use as a knife for cutting smaller branches and crafting additional tools. When using primitive tools, remember:
- Safety: Handling sharp edges carefully to prevent injury.
- Efficiency: Choosing the right tool for the task to conserve energy.

Processing Materials with Modern Tools
If you have access to modern tools, the process can be significantly faster and more precise.
Using a knife or axe, you can cut and notch wood to ensure a snug fit, increasing the stability of your shelter.
Synthetic rope can be used to firmly secure framework elements together. Be mindful to:
- Maintenance: Keep your tools sharp for effectiveness.
- Storage: Place tools safely away when not in use to avoid accidents.
Essential Bushcraft Shelter Designs
In bushcraft survival, constructing reliable shelters is crucial for protection from the elements. Mastering a few fundamental designs can ensure your safety in various environments.

Building the A-Frame Shelter
The A-frame shelter is a classic bushcraft structure that provides excellent coverage from wind and rain.
To construct this, you’ll need to create a sturdy framework by placing two longer branches at a 60-degree angle and tying them together at the top. Cover this framework with foliage or a tarp to complete your shelter.
Erecting a Lean-To Shelter
A lean-to shelter is quick to set up and effectively shields against precipitation.
Your primary goal is to lean a series of branches against a horizontal ridgepole secured between two trees. Ensure that the back of the shelter faces the prevailing winds and cover it with brush or a tarp for insulation.
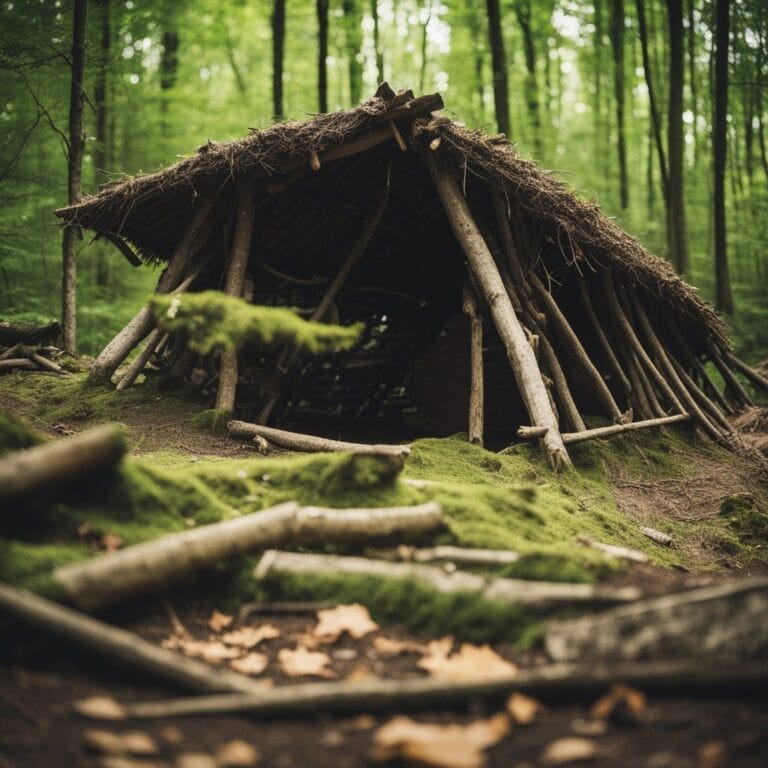
Constructing a Debris Hut
For insulation against cold environments, a debris hut is your best bet.
Begin by creating a long backbone pole that rests at an angle against a solid base, like a boulder or a tree stump. Then, stack smaller branches along the sides to create a ribbed framework and heap leaves and forest debris over it for a thick insulating layer.

Creating a Quinzhee Snow Shelter
When you’re in snowy conditions, a quinzhee can be a life-saving structure.
Start by piling snow into a mound and allowing it to settle. Then, hollow out the interior, leaving walls of at least 30 cm thickness. The compacted snow insulates well and offers a warm refuge from the harsh outside temperatures.
Step-by-Step Construction Methods
In this section, you’ll learn the essentials of constructing various types of primitive bushcraft shelters.
Each method is designed to use materials found in nature, providing you with practical ways to stay safe and dry in the wilderness.

Assembling the A-Frame Structure
To construct an A-frame shelter, you’ll need to find a sturdy crossbeam that can lay across two trees at about shoulder height.
Then, lean branches diagonally on both sides of the crossbeam, close enough to create solid walls.
For the roofing, interweave smaller branches and cover them with leaves or debris for insulation.

Setting Up a Sturdy Lean-To
A lean-to shelter starts with a strong horizontal ridgepole supported by two trees.
Lean large branches against the ridgepole at an angle to form a slanted wall. This structure should open towards a heat source, like a fire.
The back wall can be reinforced with extra branches, and then covered with leaves or pine needles for better protection from the elements.
Piling Up for a Debris Shelter
Building a debris shelter is all about insulation.
Begin with a robust ridgepole resting on the ground and a support stick at one end to create a spine.
Pile on leafy branches and forest debris until the structure is well insulated. The thicker the cover, the better the insulation.
Be sure to construct a doorway that can be blocked off to retain heat.
Sculpting a Snow Shelter
When constructing a snow cave, start by finding a snowdrift that’s deep enough for digging.
Hollow out an entrance and then an upward sloping tunnel into the main chamber, which should be carved higher than the entrance to trap warm air.
Smooth out the walls and ceiling to prevent drips and ensure stability.
Remember to poke small air holes for ventilation.
Enhancing Shelter with Bushcraft Add-Ons
When you’re looking to make your bushcraft shelter more durable and comfortable, consider these add-ons.
Not only will they improve your shelter’s structure, but they also add functionality and can help you weather the elements more effectively.
Applying Thatching Techniques
To create a sturdy and weather-resistant roof for your shelter, thatching is a critical skill.
You’ll want to layer materials like leaves or grasses in a way that water is directed away from your shelter.
Begin by securing the ridge of your shelter and work your way downwards, ensuring each layer overlaps the previous one.
This method helps your shelter remain dry inside, making it a more comfortable haven from the elements.
Incorporating a Functional Door
Adding a door to your shelter not only enhances privacy but also helps in temperature control.
You can construct a simple door from branches intertwined with vines or a tarp that you can roll up or down.
Make sure it fits snugly to prevent wind or rain from entering.
A well-fitted door can make a significant difference in the warmth and security of your bushcraft shelter.
Adding a Fire Reflective Wall
A fire reflective wall built on one side of your shelter’s entrance can significantly increase warmth inside.
By building a wall from logs or rocks at a safe distance opposite your shelter’s opening, you create a barrier that reflects the fire’s heat back towards your living space.
Not only does it conserve heat, but it also helps to illuminate your shelter, keeping it cozy during cold nights.
Maintaining and Upgrading Your Shelter
Maintaining your shelter is vital to ensure durability and safety. Upgrading your structure can also convert it into a suitable long-term survival shelter.
Let’s ensure that your hard work stands the test of time.
Preventing Collapse and Damage
Regular inspection is key to preventing your shelter from collapsing. You should:
- Check the Frame: Examine the structural integrity of your shelter’s frame. Replace any weak branches or logs to maintain a sturdy foundation.
- Reinforce the Roof: Apply additional layers of natural materials like leaves, pine needles, or grass to ensure the roof is compact and can withstand weather conditions.
Converting to a Long-Term Survival Shelter
To upgrade your temporary structure into a long-term survival shelter, consider:
- Creating a Durable Door: A solid door can protect from wind and wildlife. Use a tarp or animal hide as suggested by The Survival Doctor to cover and insulate the entrance.
- Improving Comfort: Construct a raised bed from branches or logs. Cover it with insulating materials like dry leaves or grass for added warmth and comfort.
Maintaining and upgrading your shelter are ongoing processes. By staying proactive, you’ll ensure that your shelter remains a safe haven in the wilderness.

Safety and Security Considerations
When constructing a primitive bushcraft survival shelter, your safety and security are paramount.
It’s important to consider how you can protect yourself from wildlife encounters and harsh environmental conditions.
Keeping Safe from Wildlife
Your shelter should be a sanctuary, safe from wildlife. To prevent animals from entering, seal the entrance at night or when you’re not around.
Be mindful about food storage; keep it sealed and suspended above ground, away from your sleeping area.
Misplaced food can attract unwanted guests, so maintain cleanliness.
Consider the locations known for potential wildlife threats, and if needed, learn how to create noise deterrents or natural barriers for protection.
Minimizing Exposure to the Elements
The elements can be just as unforgiving as wildlife, and exposure poses a significant risk.
Choose: your shelter location wisely to avoid natural hazards like flooding or falling branches.
The orientation of your shelter should shield you from prevailing winds and provide insulation to maintain body heat.
Use materials like leaves or ferns to create a thick, insulating layer, and reinforce the structure with debris or rocks for added security from the elements.
Lastly, insect-proof the shelter by using appropriate netting or natural repellents to ward off pesky insects.
Practicing Bushcraft Shelter Skills
To become proficient in bushcraft shelter skills, you’ll need to hone your abilities through varied practice and consistent effort.
This process will help you understand the practical applications of different types of survival shelters and build the confidence necessary for achieving self-reliance in the wilderness.
Training with Different Shelter Types
Start by familiarizing yourself with the various shelter designs like lean-tos, A-frames, and debris huts.
Each type of shelter serves a different purpose and is suitable for various environments.
For example, the lean-to is straightforward to construct and great for wind protection.
To train effectively:
- Choose a shelter type and research its construction.
- Gather materials from your surroundings, as if in a survival situation.
- Construct the shelter, paying attention to the details that provide stability and insulation.
Here’s how your training might look for each shelter:
| Shelter Type | Materials Needed | Key Focus Area |
|---|---|---|
| Lean-to | Long branches, foliage | Wind barrier construction |
| A-frame | Strong ridgepole, leaves/pine needles | Symmetrical framework and coverage |
| Debris hut | Sticks, forest debris | Insulation and snugness |
Gaining Confidence Through Practice
Building shelters repeatedly will steadily increase your confidence.
Remember, the goal is not just to build but to ensure each shelter can effectively protect you from the elements.
- Start simple: Begin with the less complex shelters to understand the basic principles.
- Work systematically: Follow each step carefully to avoid missing critical structural elements.
- Repeat often: Rebuild shelters to become faster and more efficient with each attempt.
By focusing on these skills, your ability to construct survival shelters robustly and efficiently will grow, supporting your confidence and competence in bushcraft survival situations.
Frequently Asked Questions

When venturing into the wild, it’s crucial you know how to build a survival shelter using natural materials. These are some common questions to guide you in creating a practical and safe haven.
What materials are needed to build a basic bushcraft shelter in the wilderness?
To construct a basic bushcraft shelter, you’ll need sturdy branches for the frame, foliage like leaves or pine needles for insulation, and larger pieces of bark or leaves for the roof.
Gathering these materials from your surroundings is essential for a successful build.
Can you list the steps to constructing a waterproof shelter in the woods?
First, create a solid frame, anchoring it to the ground and giving it an angled roof.
Then, densely pack the structure with foliage to repel water.
Finally, ensure the roof has an overhang and is sloped so rain can run off, preventing water from entering your shelter. Understanding these steps is crucial for staying dry.
What is the simplest type of survival shelter to construct for beginners?
The lean-to is the simplest survival shelter for beginners.
It involves leaning long branches against a horizontal support such as a fallen tree, then covering the sides with branches, leaves, and other natural insulators to protect against the wind and rain.
How do you create a sturdy survival hut in the forest?
Start by securing a strong spine for the hut, using heavy branches or logs.
Construct the frame with ribs attached to the spine, covering it with leafy branches and moss for additional stability and protection.
Make sure every part is well-supported to keep the structure sturdy.
What are the key considerations for building a survival shelter with a fireplace?
Siting your shelter near a reflective rock face with a fireplace can increase warmth.
Ensure your shelter is well-ventilated to prevent smoke accumulation and a potential fire risk.
Also, use non-flammable materials around the fireplace area for safety.
What techniques are used to construct a long-term, durable shelter in the woods?
For a long-term shelter, use interwoven branches to create a strong framework. Add layers of vegetation, such as moss, for water resistance and insulation.
Regular maintenance will help prolong the shelter’s life, so routinely check and reinforce the structure.